Monday, October 31, 2011

Another stab at the slab

Having given the first section of the lower patio a few days to dry, it was time to move on to the  next section.

DSCF3971

Once the frame is all pegged out it’s time to run up and down the side of the house with the cement until it’s filled.

DSCF3974

So that's now 2 sections complete on 1 more to go then the cement mixer can be moved down then only the gravel needs shifting and that can be done in short periods over a few days.

Saturday, October 29, 2011

Making a start

DSCF3968

Finally we have made a start and poured the the first part of the lower patio. We have to mix slightly smaller mixes due to a small problem with the motor, and it’s hard work going up and down to the cement mixer but once we get the next couple of bits done we can bring the material down and the mixer, and mix at the bottom which will help to speed things up.

DSCF3969

Just dug up a couple of the boniarto plants, and have a couple of nice ones to eat and the plants get stuck into water where they will produce roots ready to be planted for next years crop.

DSCF3970

Then the potatoes were lifted ready to be  used to seed the next crop of spuds, the beds then will be raked and prepared to take the winter bulk crops like cabbages, beetroots and onions.

Friday, October 21, 2011

We’ve got your number

Finally after 4 years we have got the number on the house.

DSCF3964

There it is we have just to paint the numbers and there it is.

DSCF3963

Looks good doesn’t it.

DSCF3965

And here is the chimney all blocked up with just a small gap at the top.

Thursday, October 20, 2011

Quick Step

The funny thing is sometimes the work seems to go on and on but every now and then things take a sudden jump.

DSCF3958

The steps are now up to a point and we have started to put the top on the cupboard at the back of the steps.

DSCF3959

And the painting of the east side of the house has moved on too, with both the walls and the window frames painted.

DSCF3961

And we have made a start on the chimney, as we won’t be using this anymore with a real fire just as the vent exit for the extractor in the kitchen, it doesn’t need such a big opening, which lets in water when it rains. So with some cut bits of racillionies we are blocking it off except for a small gap at the top.

Sunday, October 16, 2011

There that’s better.

DSCF3956

With all the work now done and the back of the house, the sill is now been fitted to the other window. We can put the pagoda back up for a while.

Friday, October 14, 2011

Busy Day

Today was another one of those days when we go round and work on half a dozen jobs at once.DSCF3948

A few more blocks go on to the steps, we are almost at the point of putting on the top of the cupboard to hold the watering valves.

DSCF3949

And a little bit of concrete to make the base of a manhole to take the cables to various places on the lower patio.

DSCF3947

Then using the rest of the cement just set in the top of the walls. And in the top of the photos you can see the rows of spuds that we have been putting in over the last few mornings, after we paid for someone to bring there machine in a rotivate the terrace as we haven’t fixed our machine yet.

DSCF3953

Oblique shot showing the rows of spuds which should be ready about Christmas time.

DSCF3950

Cleared out a levelled the corner by the font of the house ready to concrete the lower patio.

DSCF3946

The window sill under the other window has had a few offcuts of tile and cement put in to bring it up to the right level for the tiles, then the paint touched up, once the tiles are on you won’t even notice.

DSCF3952

We aren't the only ones working, our new German neighbours are having a lot of building work done to their house too.
DSCF3955

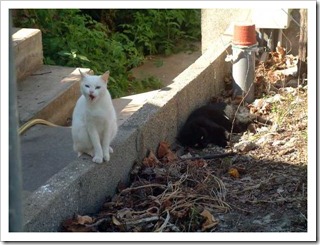
And Tabby keeps an eye open for what Meep is up to while she lies in the shade.

Thursday, October 13, 2011

Windows on the world

DSCF3945

With the windows in and the walls painted, just a few finishing touches needed, a good example is the window sills on the outside. These are made with special tiles that you can buy which have a curved edge specifically designed to kick the water off. The are also the perfect colour as they match the paint of the woodwork and contrast against the yellow of the house just right.

Saturday, October 08, 2011

Spot the difference

DSCF3943

Now it may take a moment or two to spot what has changed between this photo and the previous ones. Yes it’s the drains that run from the outflows on the roof down and under the patio. So now when you have to go outside and it’s raining, you don’t get a face full of water if the wind is in the wrong direction. Also because these drains take the water well away from the house, the rooms under the house shouldn’t get as wet as they have in the past.

Friday, September 30, 2011

Oh No!!

Well it looks like the brown stuff has hit the fan, there were a couple of reports in the local papers this week about the situation between the education department and social security, and following this everything is stopped, there will be no “convocatoria” until the situation resolved, which could take years. We are now at rock bottom, we cannot at present see any way to move forward, the private teaching will give us a little bit of money to help out but not enough to cover everything.

Wednesday, September 28, 2011

A little bit more

DSCF3942

It may not seem like much, but the surround for the back door is now finished. It’s had two coats of paint and looks fantastic. Also the wall has had it’s second coat and is finished as well. With these walls painted, we are hoping that the dampness will not get into the walls as much as in previous years.

Monday, September 26, 2011

A lick of paint

A last we are finally getting to what the whole objective of the work we have been doing is getting some paint on the outside of the house.

DSCF3936

There that looks so much better, I must admit seeing the house now with just a single coat of paint on the western wall makes such a difference. But if you look closely you can see that at the far end there is a bit which isn’t done. We haven’t done this bit cause it drops down there and until we get the lower patio and steps done we can’t reach that bit.

DSCF3937

And on the other side the wall on the bathroom is done.

Friday, September 23, 2011

Down the drain.

With the lower patio up to a certain level the drains to carry the water from the roof away, hopefully keeping the lower rooms dry so we can use them to store things with out getting damaged. 

DSCF3923

First things first, dig a ditch, luckily due to the fact that this is largely infill material this is fairly easy.

DSCF3924

Next a little sand to bed the pipe down and enable us to get the correct level. Also running a couple of conduits just in case we ever want to put power or something in the corner of the terrace.

DSCF3926

Then re infill and tramp down to cover.  No just the tricky bit at the other end which involves redirecting the exiting drain from the bottom of the ramp so that it flows down and joins this drain. The also involved a bit of hard work chiselling away the rock to get the out flow in the right place and level.

DSCF3929

Then just a little infill and a few rocks to make up the wall and job done.

DSCF3932

Wednesday, September 21, 2011

Odds and Ends

One of the problems we have is that we have a large number of different jobs on the go at once so sometimes we end up doing half a dozen different jobs in one day, and today was one of those days.

First to tackle was some more blocks on the lower steps area.

DSCF3910

On the back of the steps is going to be a little cupboard which will house the grey water valves and other stuff.

DSCF3911

Next  just a little trim of the concrete under the window in the dining room so that we can put on some tiles to make a nice window sill. This is something we overlooked when we built the window in the first place.

DSCF3914

Then just a few more bits of rendering on the vent hut

DSCF3917DSCF3915

And there all jobs done for today.

Sunday, September 18, 2011

Renderware

To finish off the vent hut we just need to put a small coat of render on to provide a good surface to paint and blend into the existing surface.

DSCF3905

And with the left over render we can finish off one small area at the front of the house which just needed a little to smooth everything off.

 DSCF3903

with this little but of filling the front is now ready for painting.

DSCF3909

Back of the house starting to look good.

Friday, September 16, 2011

Oh FFS

It now seems that there has been a delay in the “convocatoria” and we not will not be going back until October at the earliest. We have had no news until this, both me and Helen are going spare with worry over this if we don’t get back to work we have calculated we can just about survive until Christmas. This is causing big problems, as now both me and Helen are paralysed with worry about what is going to happen to us. Neither of us want to go back to the UK, we would have to leave everything we have here, and end up with nothing.

Thursday, September 15, 2011

Foam Party

The normal way round here to stick the top layer of tiles on is to use expanding foam. So after yesterdays abortive attempt due to a failed can of  foam we had a drive out to get another one.

DSCF3902

Once the foam had dried we can cut back the excess and render the outside.

Wednesday, September 14, 2011

On the tiles

with the cement fully dry after a few days, it’s time to tackle the tiles. Laying a bed of cement on which you lay the bottom layer of tiles. It’s a bit of an art to get right as you have to remember that the lowest row of tiles actually goes on the opposite way round to the rest of the tiles.

DSCF3898

At present the top row of tiles are just laid on and not stuck down as the can of foam we had was completely solid  and wouldn’t work.

DSCF3899

And it was getting dark with possible rain so time to call it a day.

Tuesday, September 13, 2011

Uncovered

After the few days to dry comes the crucial step of removing the frame work, and exposing the concrete. If the concrete is stuck to firmly to the wood then it could pull away and ruin the finish of the wall.

DSCF3896

Thankfully this didn’t happen and we are left with a nice clean pour.

DSCF3897

The tiles are just stacked on top for now, unfortunately we haven’t got enough of the reclaimed tiles so we are going to have to use new ones on this hut.

Sunday, September 11, 2011

Frame Up

Time to put the top on the vent hut. This entails first building a wooden frame round the out side and inside of the top of the vent hut, this is sloped of the inside to take the racilliones which will provide the base for the roof.

DSCF3888

Embedded in the back of the wall will be two pipes which will provide an exhaust, and also an inlet for the air.

DSCF3889

DSCF3890

Once the frame work is complete it’s time to pour the concrete, once the concrete is up to a level the racilliones need to go on.

DSCF3894

And that’s that, just time for a long shot to give some idea of how it would look.

DSCF3893

Sunday, September 04, 2011

4 years of work

DSCF3882

Over the last few days we have slowly been putting on the concrete render of the wall by the entrance.  It has taken a while to get this far. First the roof to the water tank was added.  then we built the wall round the edge. and now all it needs is a lick of paint. The photo below shows how it looked 4 years ago and how it is now.

4yearsofwork