With the shelf having had a few days to rest and the rendering of the arch being started, it was time to do something very scary, put the oven in the space and check that it fits.

See it fits….

With the shelf having had a few days to rest and the rendering of the arch being started, it was time to do something very scary, put the oven in the space and check that it fits.
See it fits….
While walking through the farmers market in Puntallana, we spotted some lovely Strawberries at a reasonable price, so we brought some and made them into jam. Unfortunately didn't get a perfect set on the jam. But good enough
Sorry the title is a reference not to the 90’s soundtrack to a video game, but to a mission name in one of my favourite series of video games “Grand Theft Auto”.

In actual fact what I am referring to is casting the concrete base for the oven, we built the outer structure a while ago with the basic shelves and it’s good to finish them off. First a web of steel reinforcing bars was added to ensure that it will take the weight of an oven full of a Christmas Turkey.
The bottom shelf doesn't need extensive reinforcing as nothing is going to sit on top of it anyway.

With both sections ready, and wood placed at the back of the oven shelf to ensure the ventilation gap remains open at the back, all that is left to do is pour the concrete.

Over the last few weeks the edges of the plasterboard have been filled and rubbed down repeatedly, now we are left with I lovely smooth surface and when it is painted hopefully you won’t be able to see the joints between the boards.
And then just as we have go it looking nice, we go and drill some dirty great holes in it!! Don’t worry these will take the light fittings. We have a central light fitting which will take a normal light, then on each side of the room, there are 2 sets of three recessed down lights which will take LED bulbs to give additional light to the sink and the worktop.

If the above is anything to go by this years crop of runner beans could be a good one, despite the fact that the weather has been very dry this year.
With the rest of the roof assembled the last step was to mount the plasterboard, this is where we came slightly unstuck. Having brought the plasterboard and cutting it down to meter widths, so it would fit into the car meant that we had a few more joins in the ceiling than we would have liked.
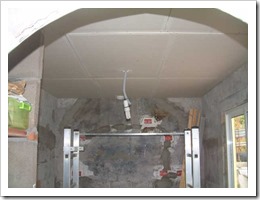
But with a little help from our friends, as Helens shoulder is still not at it’s best. All the panels were cut and fitted..
No this isn’t a post dedicated to the Punk Rock singer of the band X-Ray Spex. Sadly this is just about insulation. We cut large sheets of expanded polystyrene to size so that they would fit between the beams of the roof and just pushed them into place. The idea being that in the summer the heat will stay above the ceiling (the concrete roof gets very hot) and in winter the heat will stay below in the kitchen (as the concrete roof gets very cold).

Before we can put the rest of the false ceiling in place we needed to put some plastic sheeting in place, to keep any dampness above and stop it from getting into the ceiling.

Now trying to get a plastic sheet 2 Meters wide by just over 3 Meters long into place is not an easy thing to do. 
Then came the sticky situation of fixing it in place, we eventually discovered that if we applied silicone sealant to the beams and then using a piece of wood and poking my self through one of the gaps that had been left to put in the lights I could smooth the plastic down over the beams.

No we are not building a replica of a submarine with a snorkel and periscope.. This is the ventilation for the kitchen hob and roof.. it is designed to go up inside the old chimney that used to be in the kitchen. one tube will come lower and go through the new false ceiling and be connected to the extractor fan that is to be mounted over the cooker. The other tube (the smaller one) will sit above the ceiling and ventilate the space above the ceiling

With the wood mounted over the chimney opening and the pipes secured in place with some duct tape the rest of the base of the chimney was filled with expanding foam to secure it all in place and seal the chimney off, with just the two pipes going through.
Sometimes living on a small island in the Atlantic can lead to some interesting weather. None more so than when we have the hot dry weather, this can trap the cooler damp air underneath, and therefore also traps the cloud. So what you end up with is sometimes the top of the cloud comes right up almost to the house and you look out over a sea of cloud…Now this is very common at the top of the mountain but very very occasionally we get it at our level.

View out over the north coast showing the cloud tops

As the cloud come closer it get pushed up the ravines…
Now normally it’s Helen that does most of the building work, but at some point over the last few days Helen has pulled a tendon in her shoulder. So up to the plate steps the super sub…..Theresa
It was left down to Theresa to cut and fit the remainder of the cross beams for the false ceiling.
It didn’t help that today was one of the hottest days of the year so far.
But with some sweat and perseverance
Soon the job was done.
Before we can finish the false ceiling, we need to ensure that above the ceiling is ventilated.
This involves drilling some holes in either side of the wall above the level of the roof and fitting a grill on the outside to stop bugs getting in.
The holes on the inside.
And then the holes on the outside covered by the grills.
The outer ring of the beams that support the false ceiling are screwed to the wall using massive coach bolts, Once this is complete the cross beams are then individually cut to size and fitted in place, and screwed in place from the bottom.
The ring is complete
The first of the shorter cross beams in place.
Fitting the beam around the cooker unit was a little complicated, a number of pieces needed to be cut and fitted exactly right.
Today we started to put up the beams and woodwork ready for the false ceiling, which is going up in the kitchen. We are putting in a false ceiling for a number or reasons.
1) To insulate the kitchen from the concrete roof, the solid concrete absorbs a lot of heat from the sun which is then radiated out into the room. adding the false ceiling and insulation will stop the room form heating up in the summer and loosing heat in winter.
2) Appearance, the existing roof is quite rough on the inside and to make it good would have required a lot of plastering, Plus there is also the beam along then end of the room which supports the chimney, the false roof will hide all this.
3) Electrics, it is so much easier to run the conduit on the roof, that have to chisel it in. Also using a false ceiling gives us the ability to use recessed LED lighting.
To start with we put the two beams on each side of the room, this wasn’t easy due to the bad state of the walls, if you are lucky you can drill into something solid, if not we tried to use a compound to glue the raw plug in place, which was a bit of problem, but we figured out a reasonable system and finial got the beams in place.
One of the downsides of Canarian doors is that they tend to have a gap down the side, which if you are not careful lead to a howling wind whistling round the door.
To counter this we are putting a wooden strip behind the door…
The strip fitted in place
Close up showing the join.
Strip fitted with the door back in place, now just a little foam strip on the edge of the door will seal it and stop draughts coming in.
With all the electrics conduit in place now we can start the process of making the walls clean and straight ready for tiling. First just a rough coat of cement render to fill in the lower section of the wall that wasn’t plastered before due to the old kitchen that was here before.
Once the hole in the floor was filled in al that was then left was to fill in the rest of the holes in the walls
And just a little bit around the distribution box to finish off
With the conduit run in the next step is to fill it back in again, straight forward and simple
All the conduits held in place nice and securely with the wood.
Pour in the cement until its full.


